How to Draw Pencil Sketch
20 top sketching tips to help elevate your skills

Working a handful of useful sketching tips and tricks into your creative workflow will have rewarding results for you and your sketchbook. We know the pain of staring down at a blank page and not knowing where to start, with even the roughest of sketches feeling completely out of reach. So we have gathered lots of helpful sketching tips from a wealth of expert artists to help you get those first marks on the page.
We have a number of tips for both beginners and more advanced artists. Our range of pointers will help you with everything from your pencils to shading, silhouettes to smudging and more. While covering the technical side of sketching, we've some tips on how to get inspired, because we know that finding inspiration can sometimes be the hardest part. Either way, we should have a few tips to help everyone on their sketching journeys.
If you're new to the wonderful world of sketching or are just looking to update your current sketching kit, then have a look at our guide to the best pencils and best sketchbooks and treat yourself to some new gear.
Click the icons in the top right of the pictures to enlarge them.
Sketching Tips
01. Know your pencils
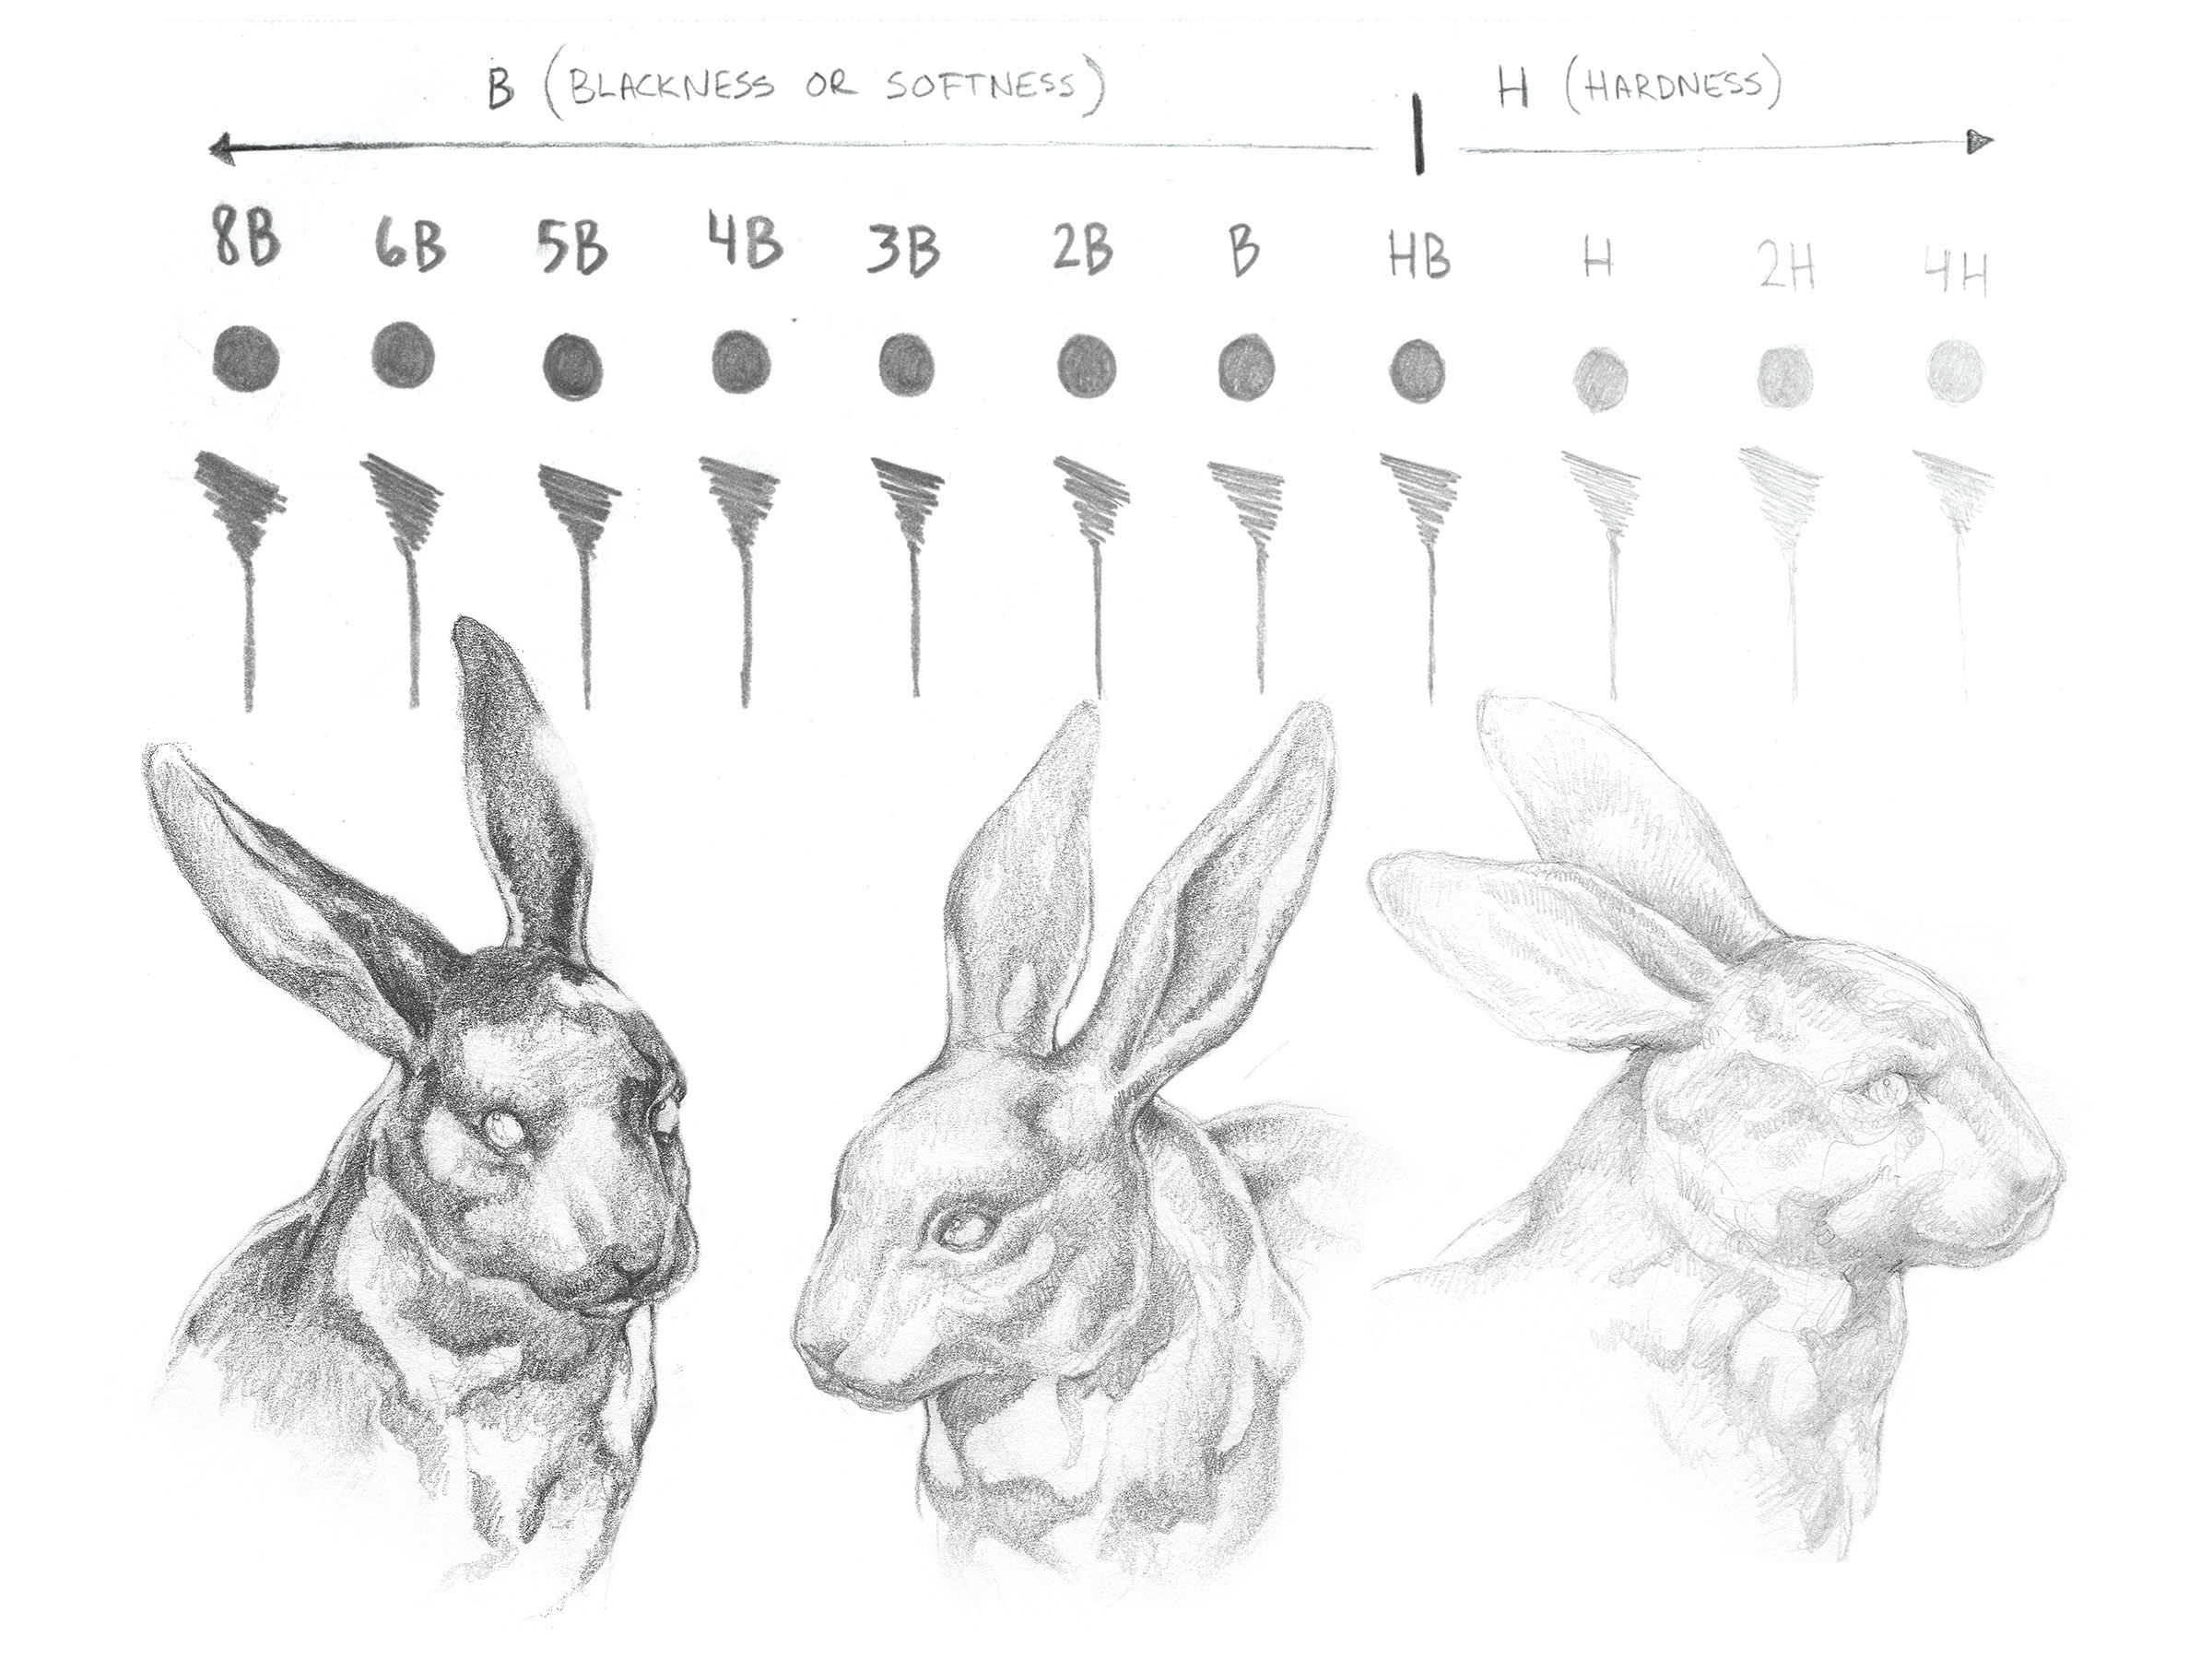
Having the right pencil to begin drawing your pencil sketch is one of the most essential sketching tips. The hardness of the graphite is indicated on the side of the pencil: 'B' pencils are softer, 'H' are harder, and 'HB' sits in the middle – there's a big difference between a 4H and a 4B. "I recommend starting somewhere on the H scale as a foundation and then finishing with the darker B scale," says travelling convention artist Tim Von Rueden.
When you're learning how to draw, it's also worth considering using mechanical pencils alongside traditional ones. "Mechanical pencils are usually better suited for precision, while traditional pencils are great for laying down large areas of texture," says Von Rueden. "Keep in mind that most mechanical pencils come with HB pre-inserted, which gives you only the middle range to work with."
See the best mechanical pencils here.
02. Take control of your pencil
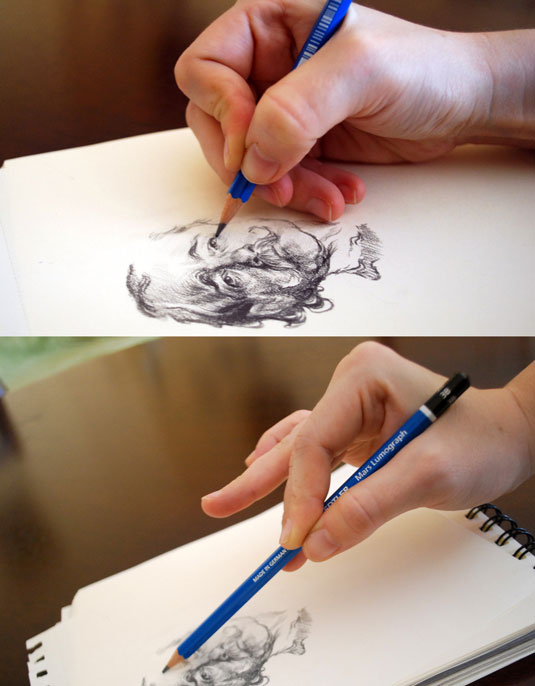
"If you position your hand closer to the end of the pencil, you have more control and precision, but heavier strokes (darker markings)," says illustrator Sylwia Bomba. "Gripping further up the pencil will give you less control and precision, but lighter strokes (lighter markings)."
For more advice, read our article on how to hold a pencil correctly.
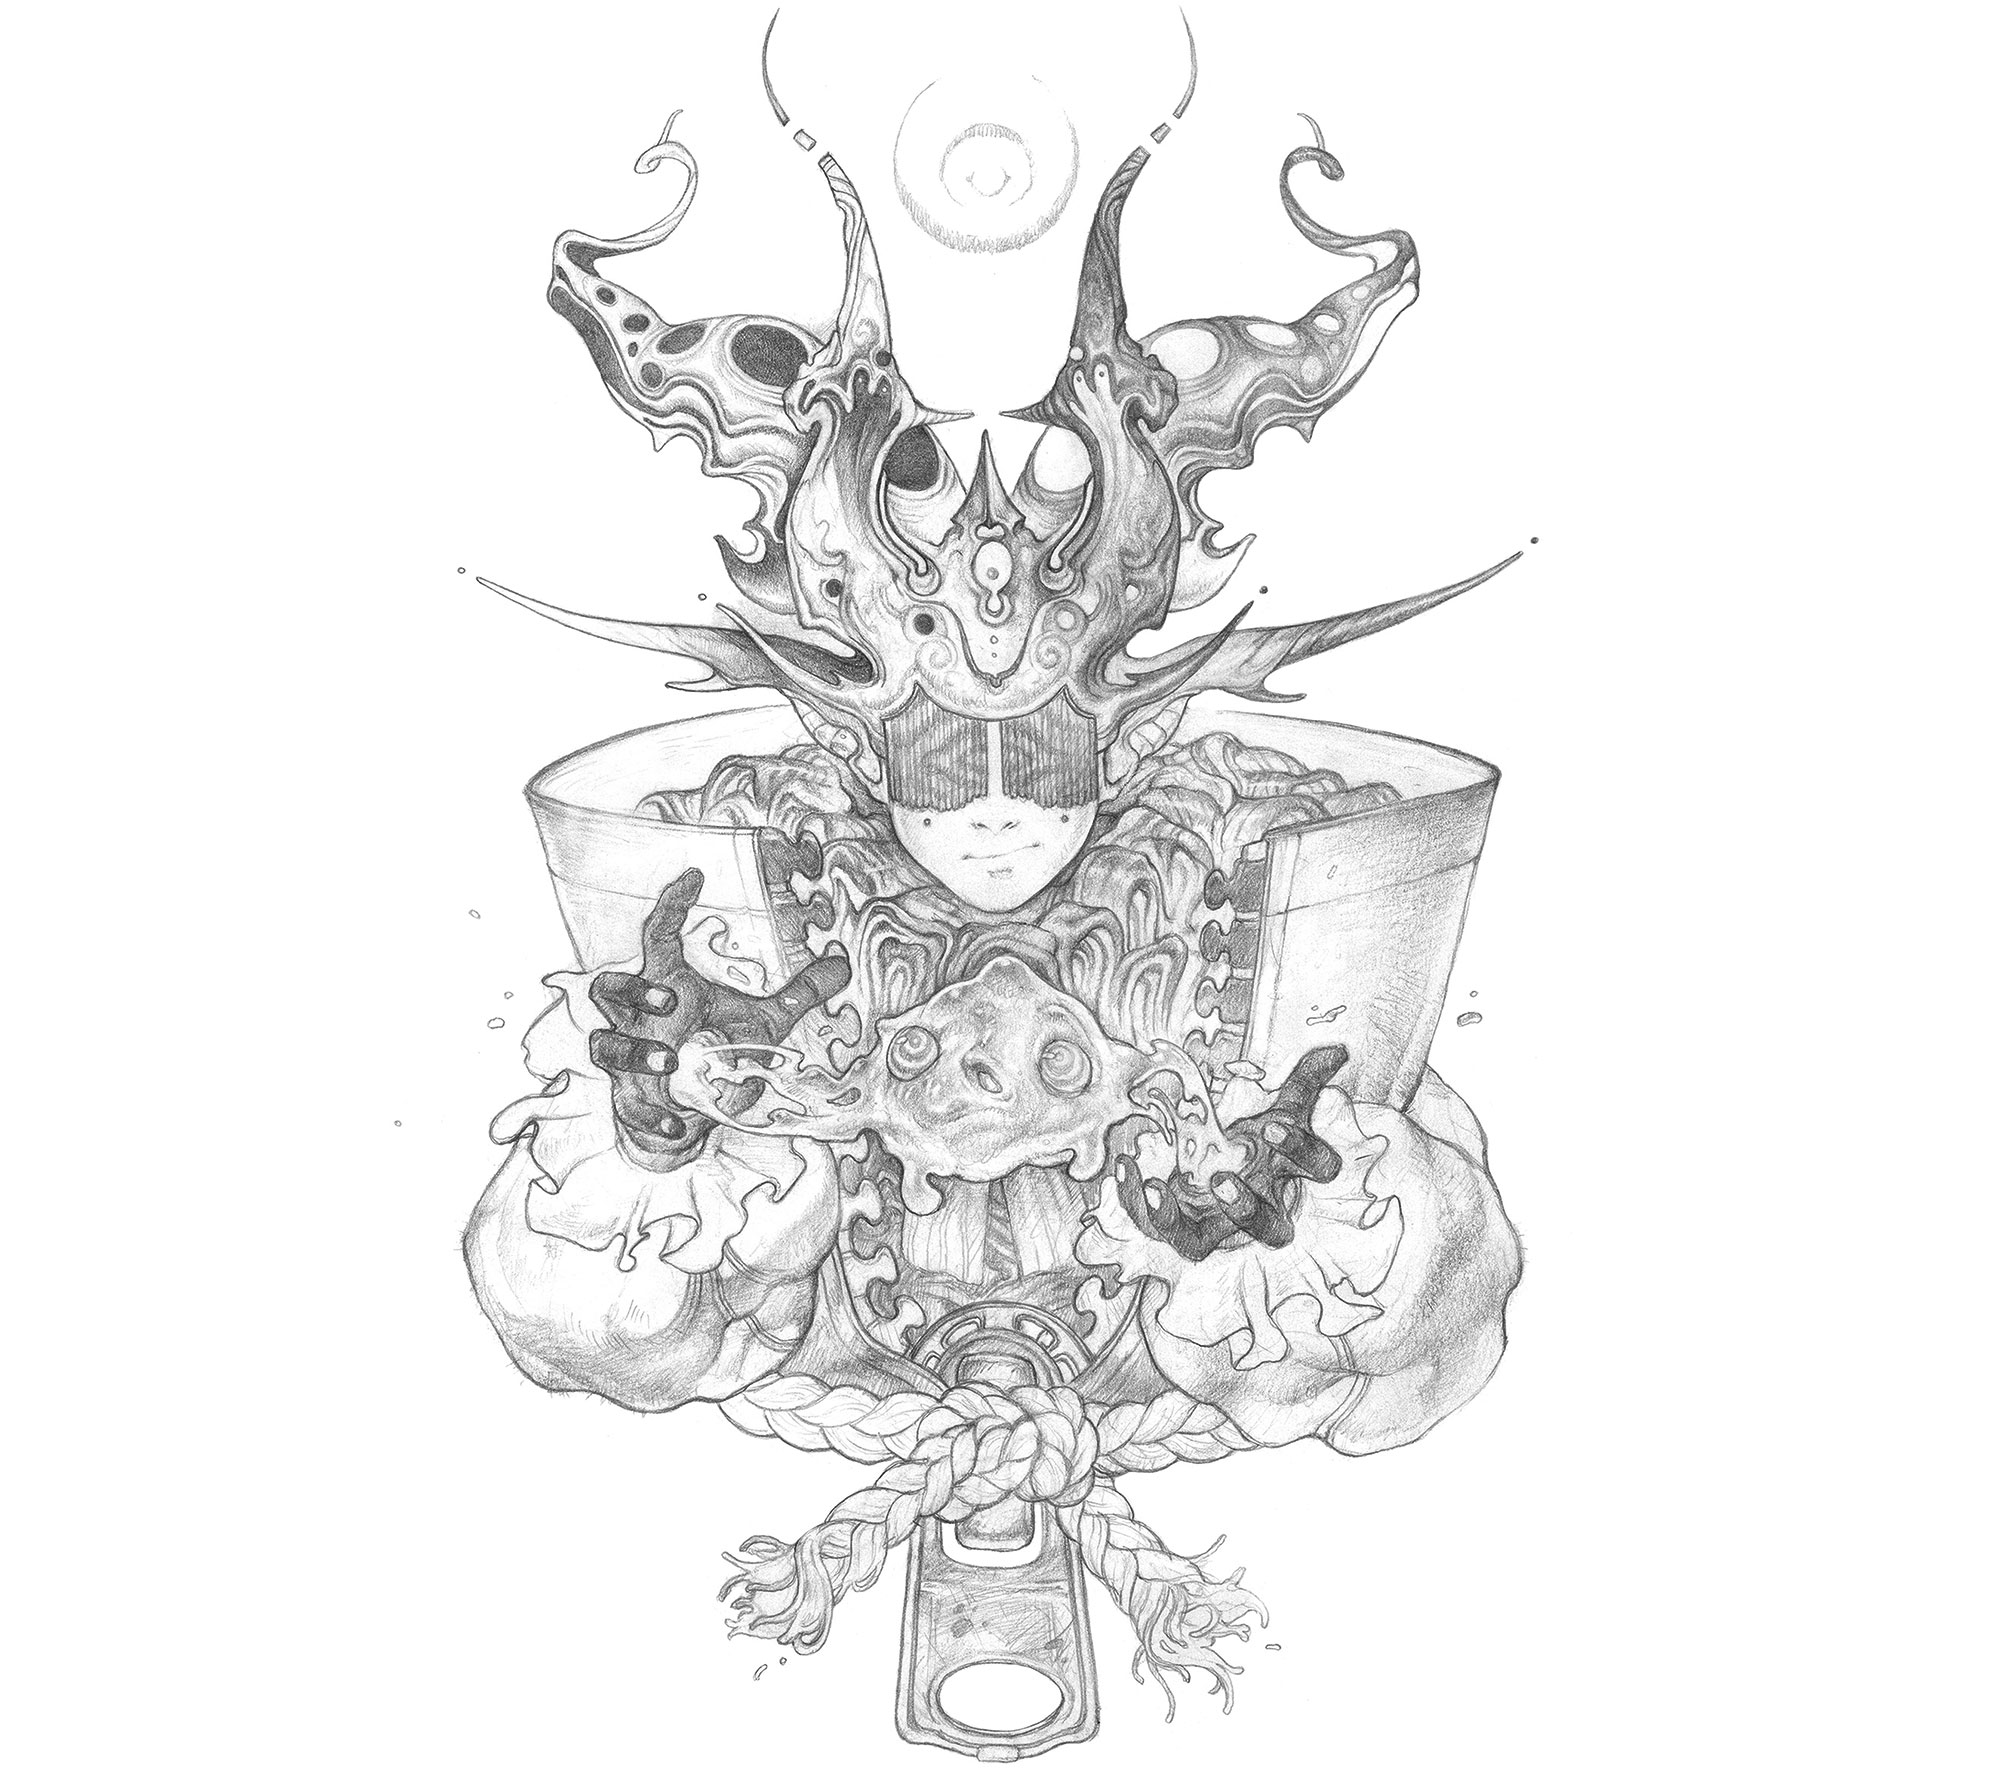
03. Try different mark-making methods
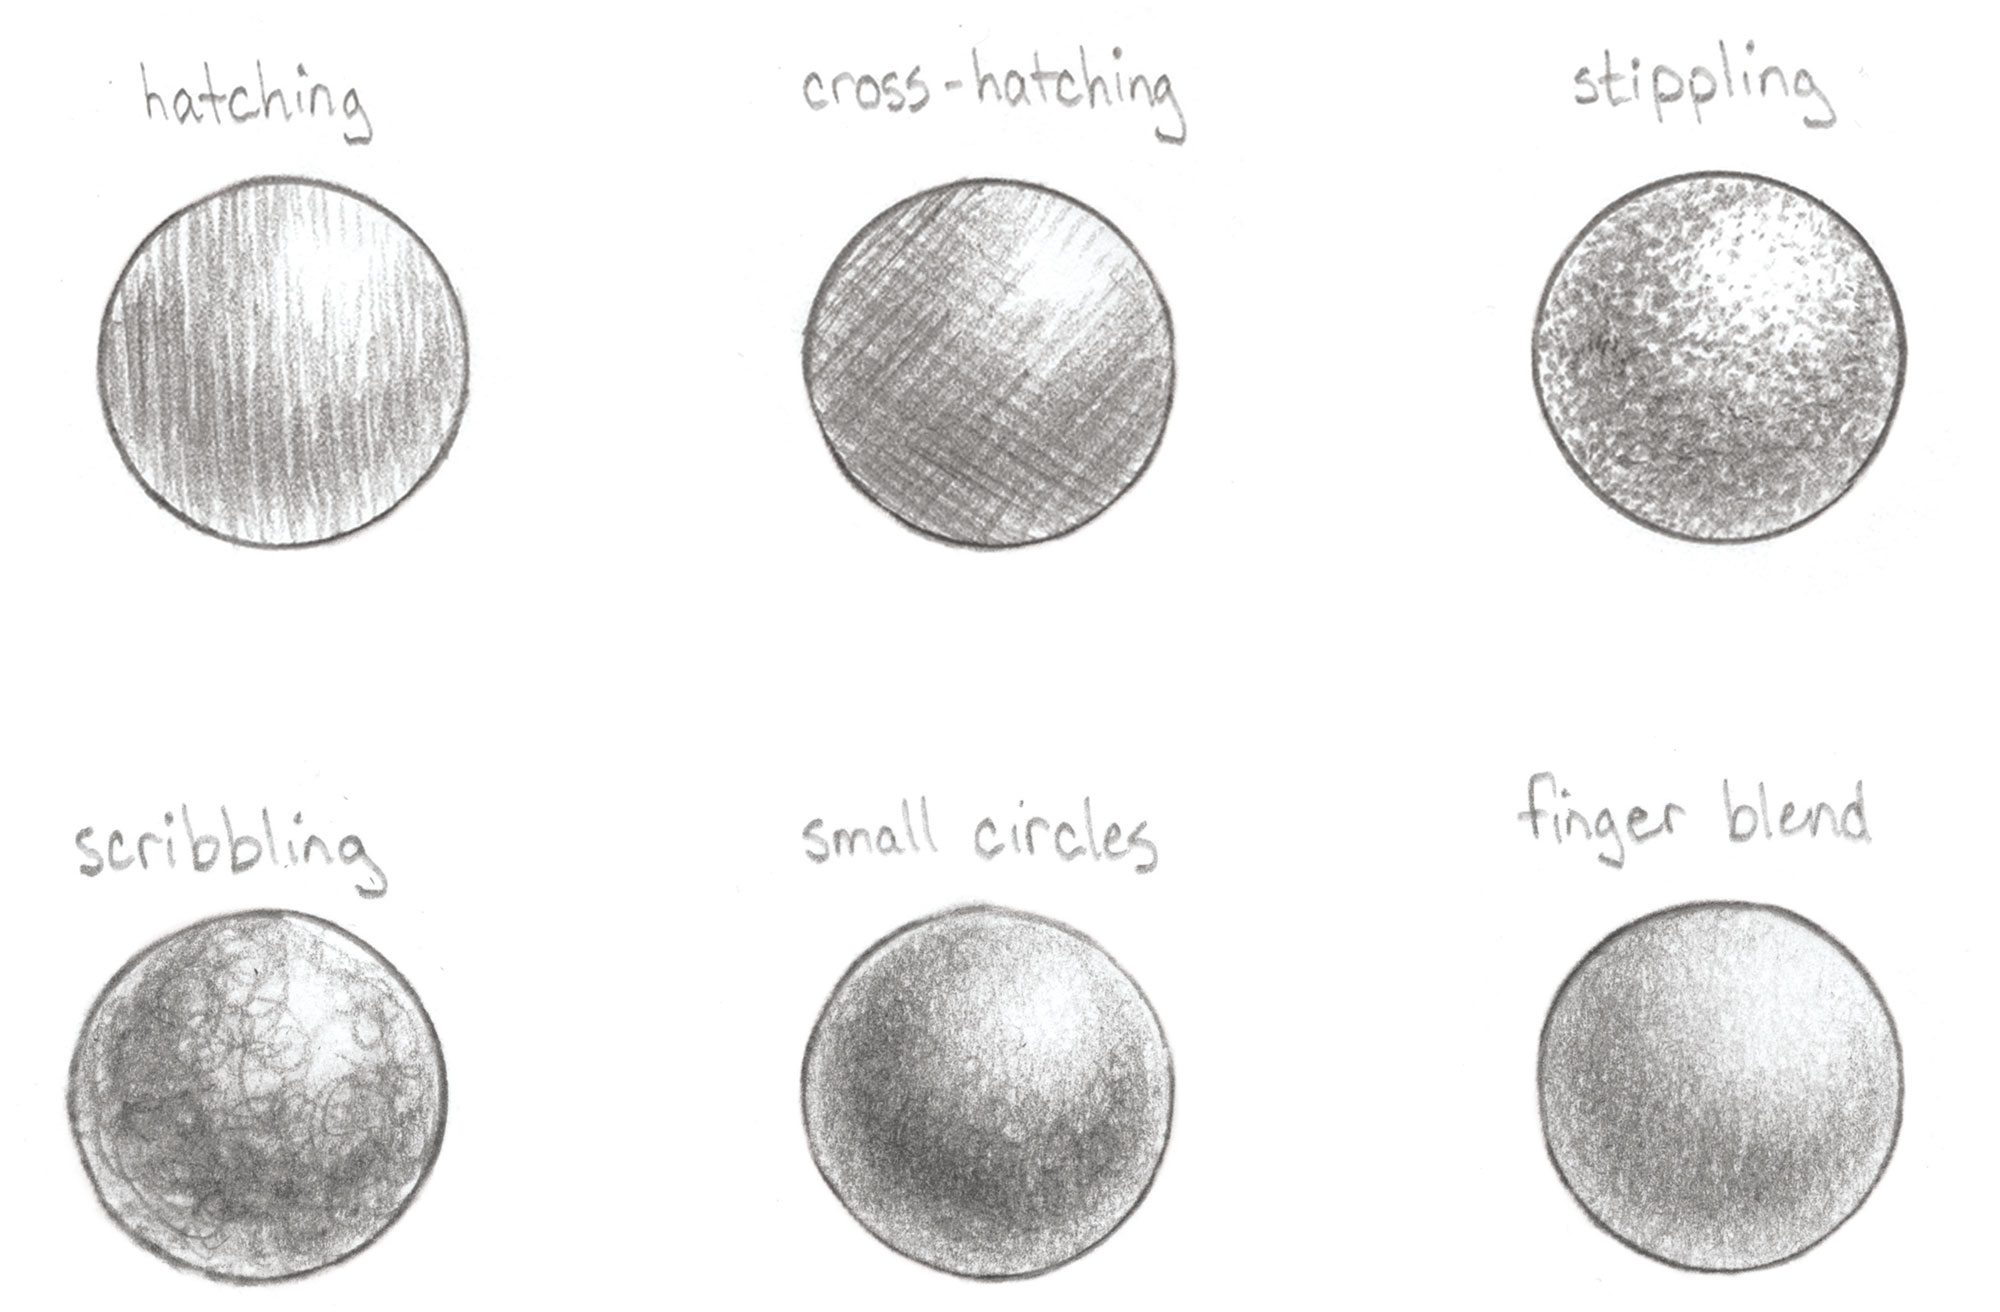
There are plenty of sketching tips and techniques to help you achieve different styles and effects. Above are some examples demonstrating different ways to create form and depth. "It's important to experiment and find what works best for you, to not only complement but enhance your style," explains Von Rueden. "While I prefer smoother value transitions with the pencil strokes blending in against a thin outline, you may be more partial to cross-hatching against a bold outline."
04. Vary your lines

Use varied lines, says illustrator Rovina Cai. "Not all lines are equal. Subtle shifts in the width and darkness of your lines will create a dynamic, visually interesting drawing. Controlling the kind of mark you put down can be tricky in the beginning, but with practice you will be able to create a variety of marks that work together to make a cohesive image. Experiment with different pencil grades (from 3H to 6B) and with holding the pencil at different angles."
05. Avoid smudging
"When shading, use an extra piece of paper underneath your hand," advises artist Brun Croes. "This will minimise the amount your hand smudges your pencil lines. If you're right-handed, start shading from left to right; if you're left-handed, start at the right and move to the left.
"There's nothing more frustrating than trying to make a clean-looking drawing that loses its brilliance and value thanks to smudging. Instead, use smudging to your advantage every now and then to smooth out shading. You can do this with several tools. I use a simple piece of tissue paper to get the job done."
06. Control your edges
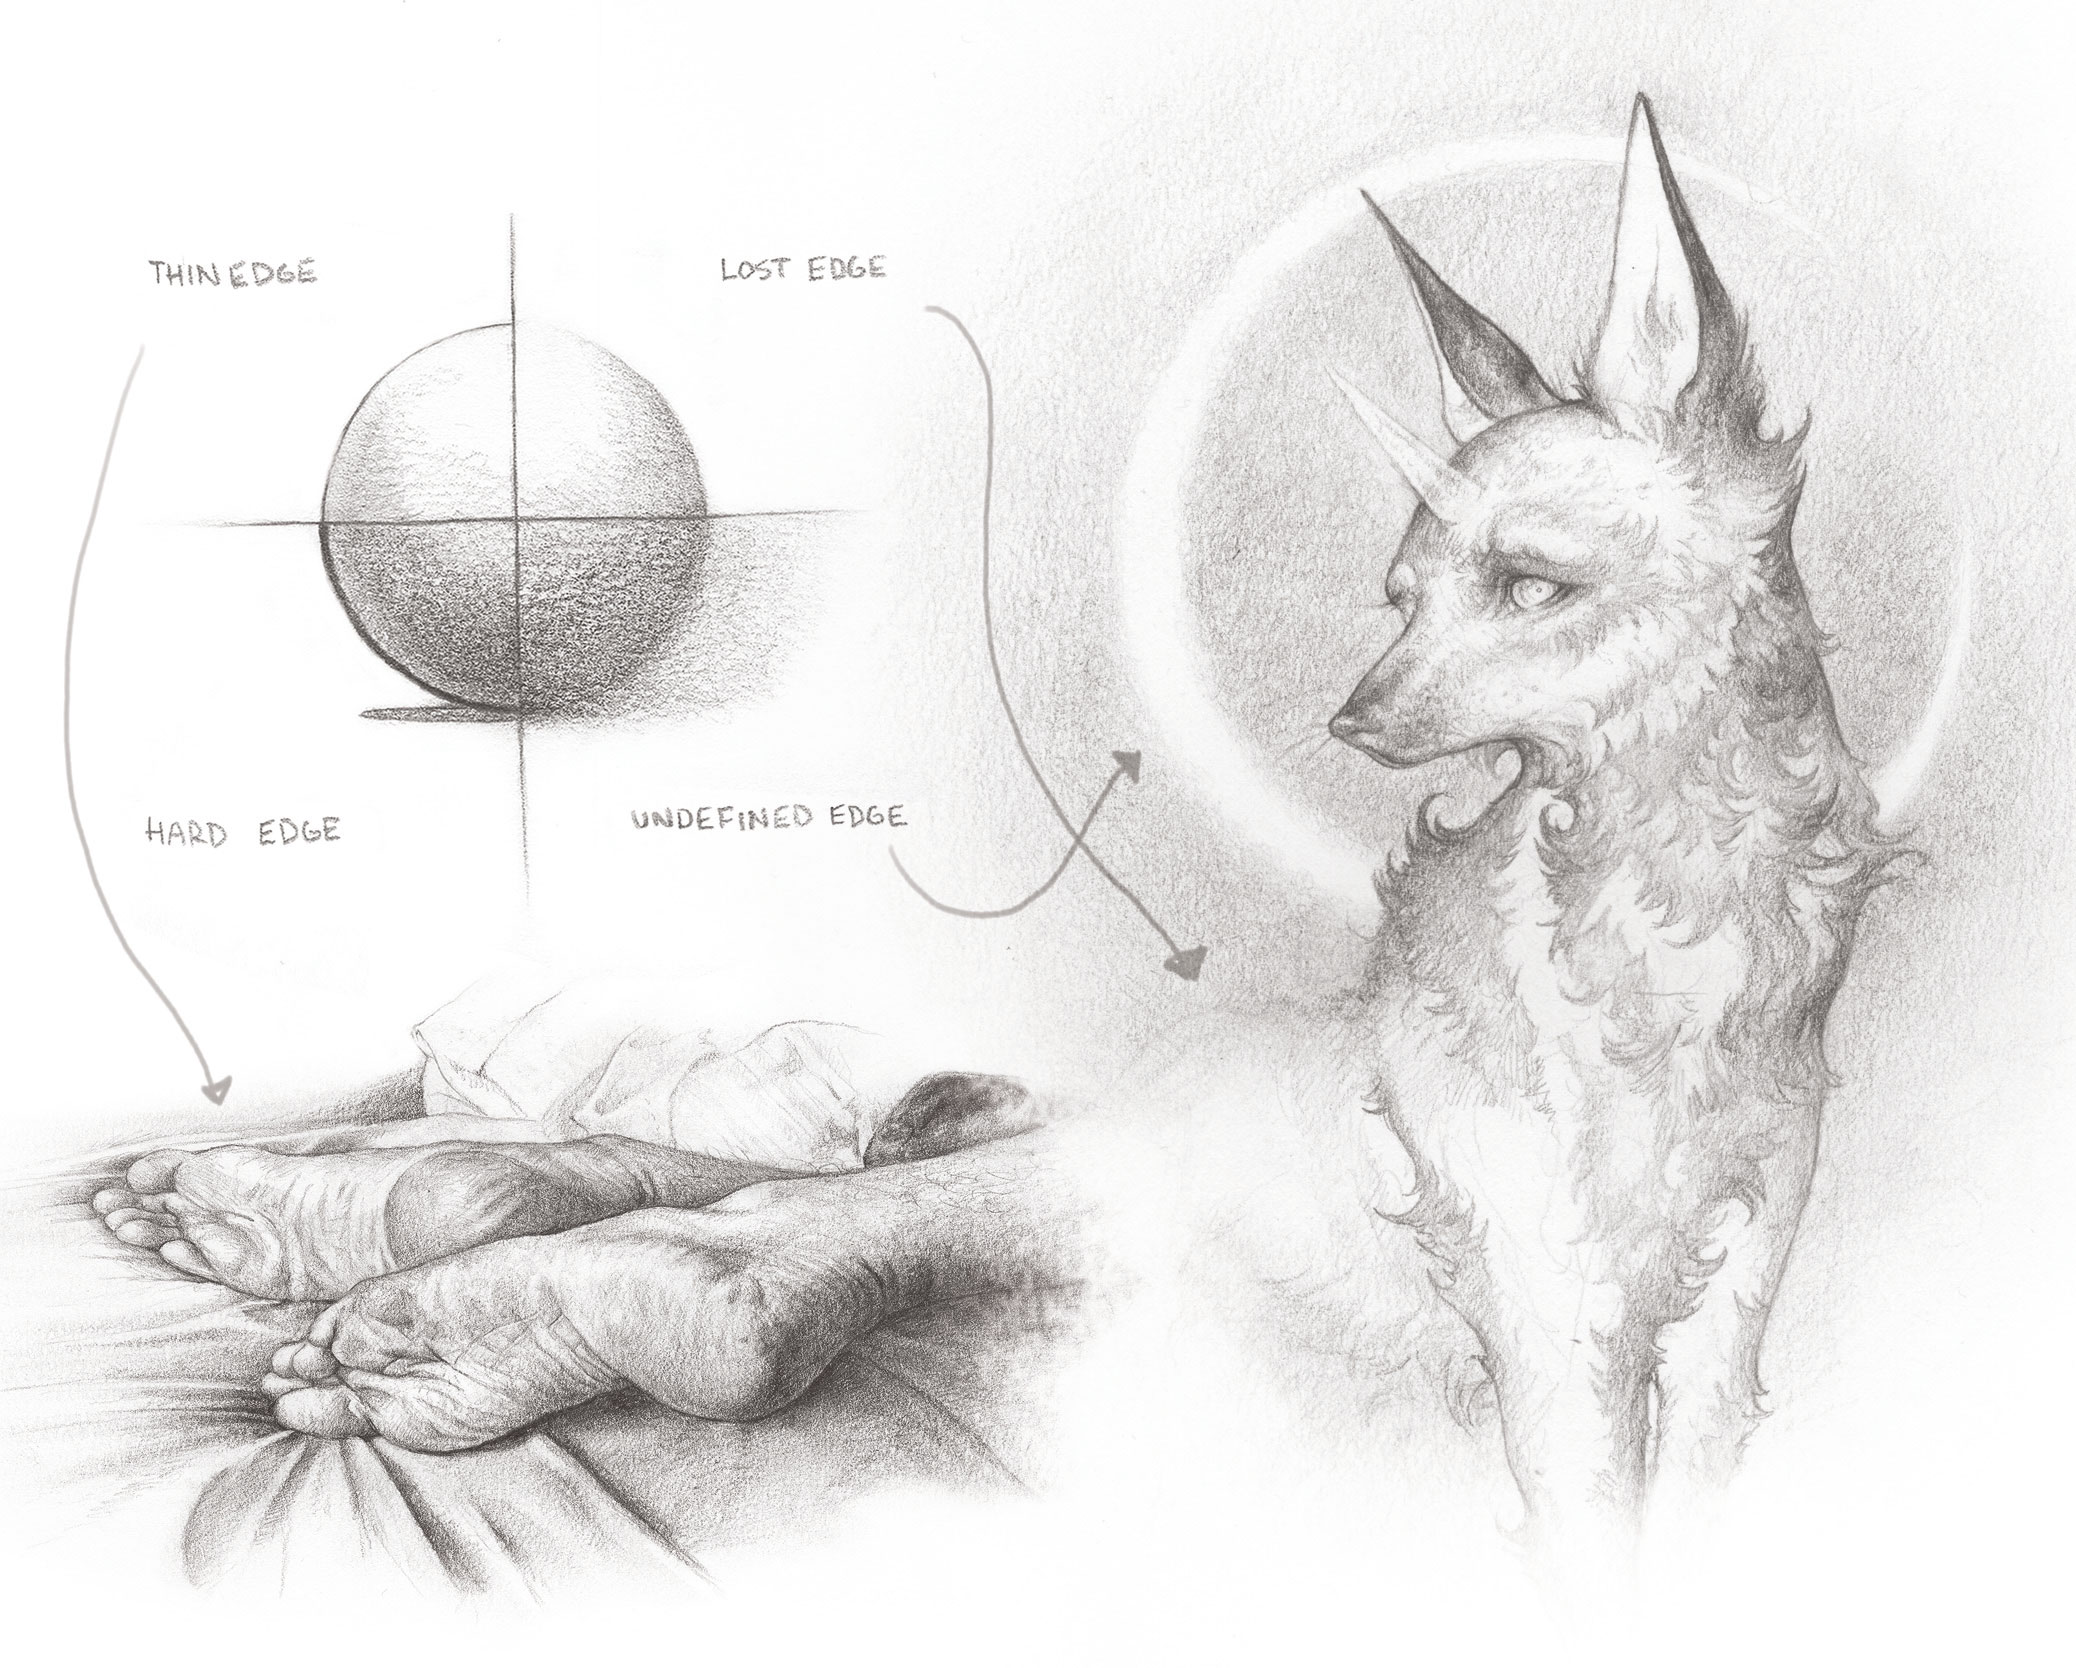
Von Rueden uses four different sketching techniques to define object edges: thin, hard, lost and undefined. A thin and hard edges give objects solid borders. Lost edges occur when the object and background values start to blend together, so the edge is implied rather than defined. Undefined edges need to be deciphered by the viewer themselves. He suggests exploring all four types, and combining them to create interest within your work.
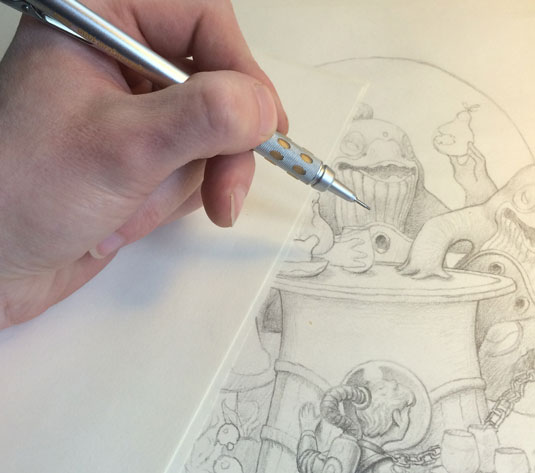
07. Use a blending stick for smooth shading
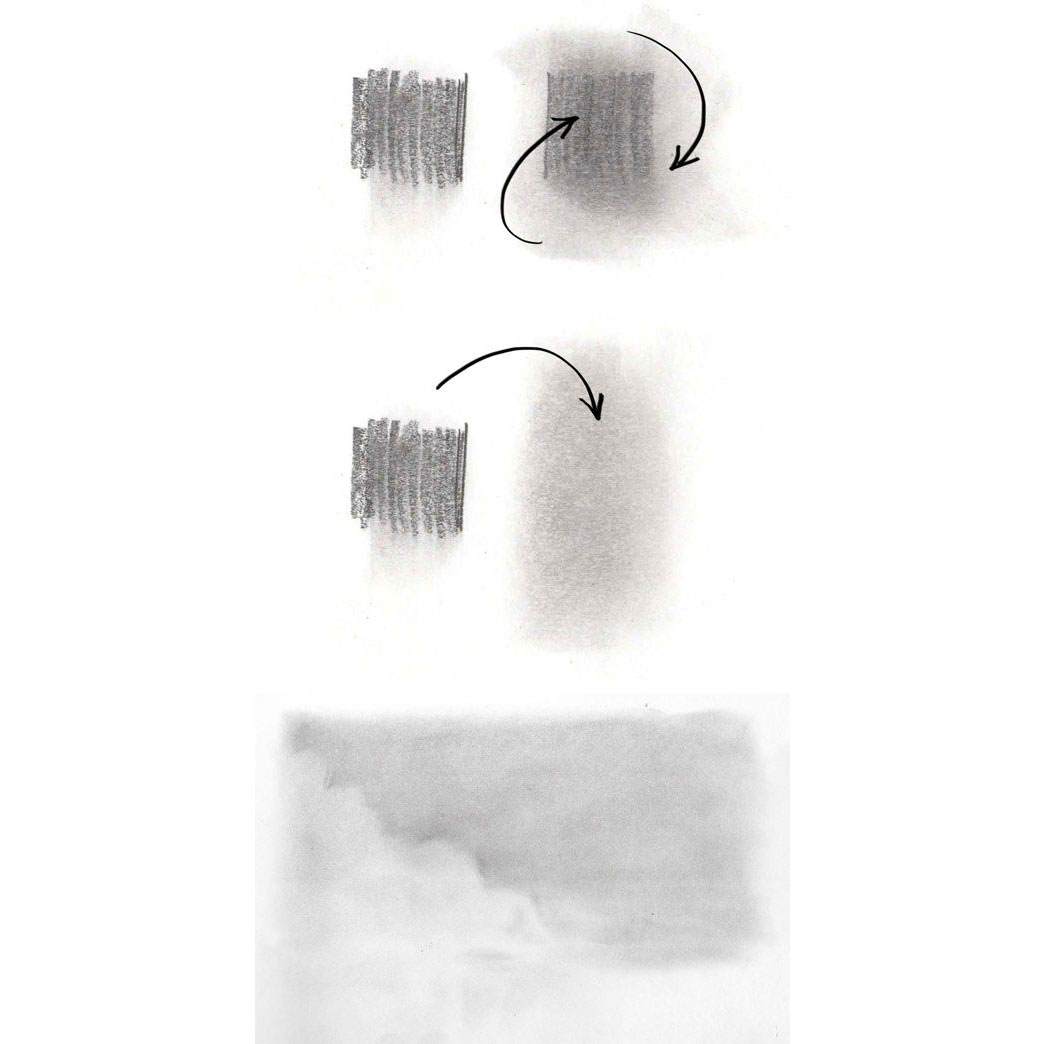
It is possible to create smooth, blended effects using pencils – for example, to capture a sky. "Sometimes it's preferable for your shading to be less sketchy and more smooth and subtle," says artist Marisa Lewis. "Pencil lines don't blend perfectly unless you're very careful."
To avoid your initial scribbles showing through, Lewis uses a particular technique – see more art techniques here. "Use spare paper to doodle a big swatch of soft graphite or charcoal pencil, then use a large blending stick to pick up the soft dust to use for your image," she explains. "Keep using the blending stick and adding more scribbles as you need more graphite." You can then build up darker areas to create definition.
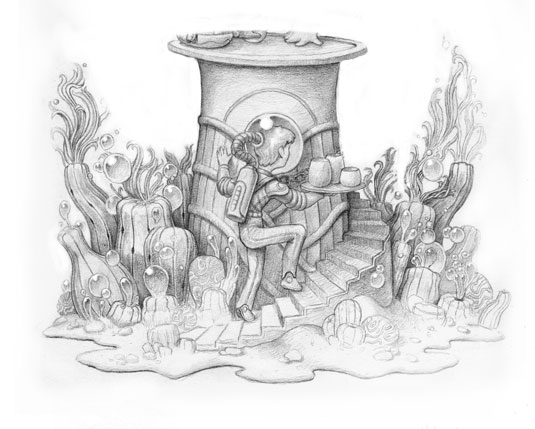
08. Apply the 70/30 rule

One of the most vital sketching tips is that less can be more! The 70/30 rule helps you create effective compositions. The idea is that 30 per cent of your sketch is filled with the main focus and detail, and the remaining 70 per cent is filler. This less interesting area helps direct attention towards the main subject of your artwork. You can see the rule in action in Von Rueden's sketch above.
09. Make it (almost) symmetrical
"I like symmetrical drawings, but they often look boring all too quickly," says Croes. "A good way to prevent this is to add some subtle changes and only keep the general lines symmetrical instead of mirroring every small part. Keeping some elements asymmetrical helps to avoid boring repetition."
10. Differentiate different textures
To show different textures within your sketch, you need to adjust your technique. "You wouldn't want to shade skin the same way you shade metallics or fur. They each have unique properties and capturing that will elevate your drawings because of the accuracy depicted," says Von Rueden.
A good starting point is to consider if the texture is rough or smooth, and then if it absorb or reflects light. "A reflecting and smooth texture, such as chrome, usually has higher contrasts and prominent highlights, while an absorbing and rough texture like cotton has low contrasts and little to no highlight present," he continues.
Next page: Advanced sketching tips to take your drawings to a new level
Current page: Sketching tips for beginners
Next Page Sketching tips: Advanced

ImagineFX is the No.1 selling digital art magazine for fantasy and sci-fi enthusiasts! Featuring digital and traditional drawing skills, game design, manga and film art each issue is crammed with training and inspiration from leading artists in their fields. Whether it's learning from comic art's Adam Hughes, fantasy art's John Howe, or digital painting's Loish, ImagineFX has you covered. ImagineFX has been inspiring artists for 15 years!
Related articles
Source: https://www.creativebloq.com/illustration/sketching-tips-beginners-81516497
0 Response to "How to Draw Pencil Sketch"
Post a Comment